Trusted by Market Leaders in Education, Travel, Finance and E-commerce since 2007


We put excellence, value and quality above all - and it shows


A Technology Partnership That Goes Beyond Code

“Arbisoft has been my most trusted technology partner for now over 15 years. Arbisoft has very unique methods of recruiting and training, and the results demonstrate that. They have great teams, great positive attitudes and great communication.”


Playwright + Cucumber: A Powerful Combination for Reliable End-to-End Testing


In this blog, we will learn how to integrate Cucumber with Playwright. The goal is to start a very simple project with a very simple scenario. The idea is to start from scratch, configure everything, and learn how it works.
Before writing our tests, let’s refresh our knowledge. Cucumber is a behavior-driven development (BDD) testing framework that allows testers, developers, and business analysts to define automated acceptance test scenarios or test cases in simple English (Gherkin syntax).
Gherkin syntax is a simple, human-readable language used in behavior-driven development (BDD). It uses keywords like Feature, Scenario, Given, When, Then, And, But, Background, and Examples to arrange executable specifications in plain text (.feature files). It connects technical and non-technical teams and helps them understand the system by defining behavior using cause-and-effect steps. It describes acceptance criteria or user stories as testable scenarios, making automated tests clear, consistent, and maintainable for everyone.
- Feature
- We define what functionality is being tested.
- Scenario
- We describe a specific test case.
- Parameters
- We use double quotes to pass dynamic values mapped in step definitions.
- Background
- It runs before every scenario in the feature.
- Scenario Outline
- We use it for data-driven testing.
- Comments
- We use it for comments and it start with #.
- Rules
- We use it to group related scenarios.
- Given
- We write our Precondition or initial state
- When
- We write our actions that are performed by the user
- Then
- We write our expected outcome
- And / But
- We use them to add more steps without repeating Given/When/Then
Prerequisites
- Ensure that Node.js is installed on your computer (Windows or macOS).
- Ensure that a code editor or IDE is installed on your computer, such as Visual Studio Code.
- Install the Playwright extension in your IDE.
- Install the Cucumber extension in your IDE.
Project Setup
Create a folder on your machine for your project and name it, for example,
playwright_cucumber_testing.Open the terminal and run the following command:
npm init -yThis creates a Node.js project and generates a package.json file with basic metadata.
Install Cucumber using the following command:
npm install -D @cucumber/cucumberInstall ts-node using the following command:
npm install -D ts-node
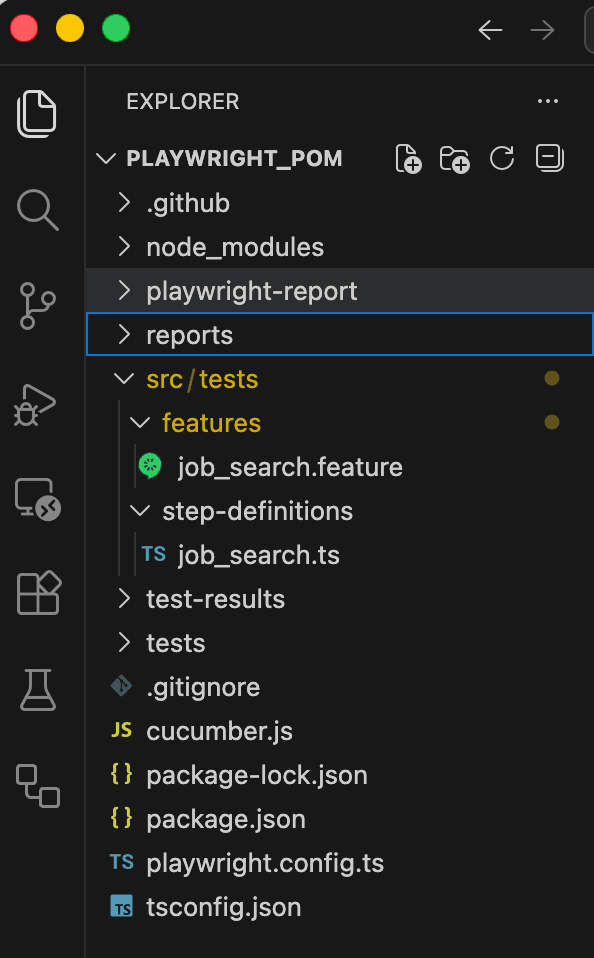
In your project, create a src folder for the source code, and inside it, create a tests folder. Then, create the following two folders inside the tests folder:
features
Holds .feature files
step-definitions
Holds .ts files for step definitions
Create chat.feature inside the features folder and chat.ts inside the step-definitions folder.
See the screenshot below for the file structure.
Configuration Files
In your project, create a tsconfig.json file and configure the TypeScript compiler options:
Include everything under the src directory
Exclude the node_modules directory
Add the following code to your tsconfig.json file:
    {
    "compilerOptions": {
        "target": "ES2020",
        "module": "CommonJS",
        "strict": true,
        "esModuleInterop": true,
        "outDir": "dist"
    },
    "include": ["src/**/*"],
    "exclude": ["node_modules"]
    }
Now, create a cucumber.json file and add the following code to it:
{
 "default": {
        "paths":[
            "src/tests/features"
        ],
        "dry-run": false,
        "formatOptions": {
            "colorsEnabled": true,
            "snippetInterface": "async-await"
     },
        "require": [
            "src/tests/step-definitions/*.ts"
        ],
        "requireModule": [
            "ts-node/register"
        ]
    }
}
Here
- paths
- path to your feature files
- dryRun
- Set to false
- format (Will add later)
- progress bar, JSON report, HTML report
- snippetInterface
- async-await (required for Playwright)
- Require
- path to your step definitions
- path to your step definitions
- Cucumber extension settings (IDE)
- We have to configure the feature paths and step definition paths in settings.json of cucumber extension. We enable it for navigation from feature files to step definitions.
"cucumber.features": [
"src/tests/features/*.feature",
],
"cucumber.glue": [
  "src/tests/step-definitions/*.ts"
]
- package.json
Add the following script to your package.json file to execute Cucumber:
"scripts": {
  "cucumber": "cucumber-js"
}
Creating a Feature and Step Definitions
We will use a simple website (Arbisoft’s Hirestream) to test the job search functionality.
Job_search.feature file:
Feature: Job Search
 User should be able to search for jobs on Hirestream

 Scenario: Search for a job
   Given A user is at the arbisoft's hirestream page page
   When A user searches for a "Product Manager" and clicks on the search button
   Then the page show display available vacancies
Job_search.ts file:
import {
   Given,
   When,
   Then,
 } from "@cucumber/cucumber";

 import { Page, Browser, chromium, expect } from "@playwright/test";

 let browser: Browser;
 let page: Page;

Given("A user is at the arbisoft's hirestream page page", async function () {
 browser = await chromium.launch({ headless: false });
 page = await browser.newPage();
 await page.goto('https://arbisoft.hirestream.io/careers/', {
   waitUntil: 'domcontentloaded'
 });
});


 When('A user searches for a {string} and clicks on the search button', async function (job: string) {
   await page.getByRole('searchbox', { name: 'Search' }).click();
   await page.getByRole('searchbox', { name: 'Search' }).fill(job);
   await page.getByRole('button').filter({ hasText: /^$/ }).click();
  });

 Then('the page show display available vacancies', async function () {
 await expect(
   page.getByText('Product Manager', { exact: false })
 ).toBeVisible();
});
Notes:
- We use
async/awaitto handle asynchronous operations in Playwright. - The
jobis provided as a parameter in quotes. - The final
Thenstep verifies that the user has successfully navigated to the search results page.
Running the Test
We run the script from package.json. Open the terminal in your IDE and run the following command:
npm run cucumberBy default, tests run in headless mode. To see the browser, set headless: false in Playwright’s launch() options in the job_search.ts file.
You can also slow down execution using Playwright options, if needed.
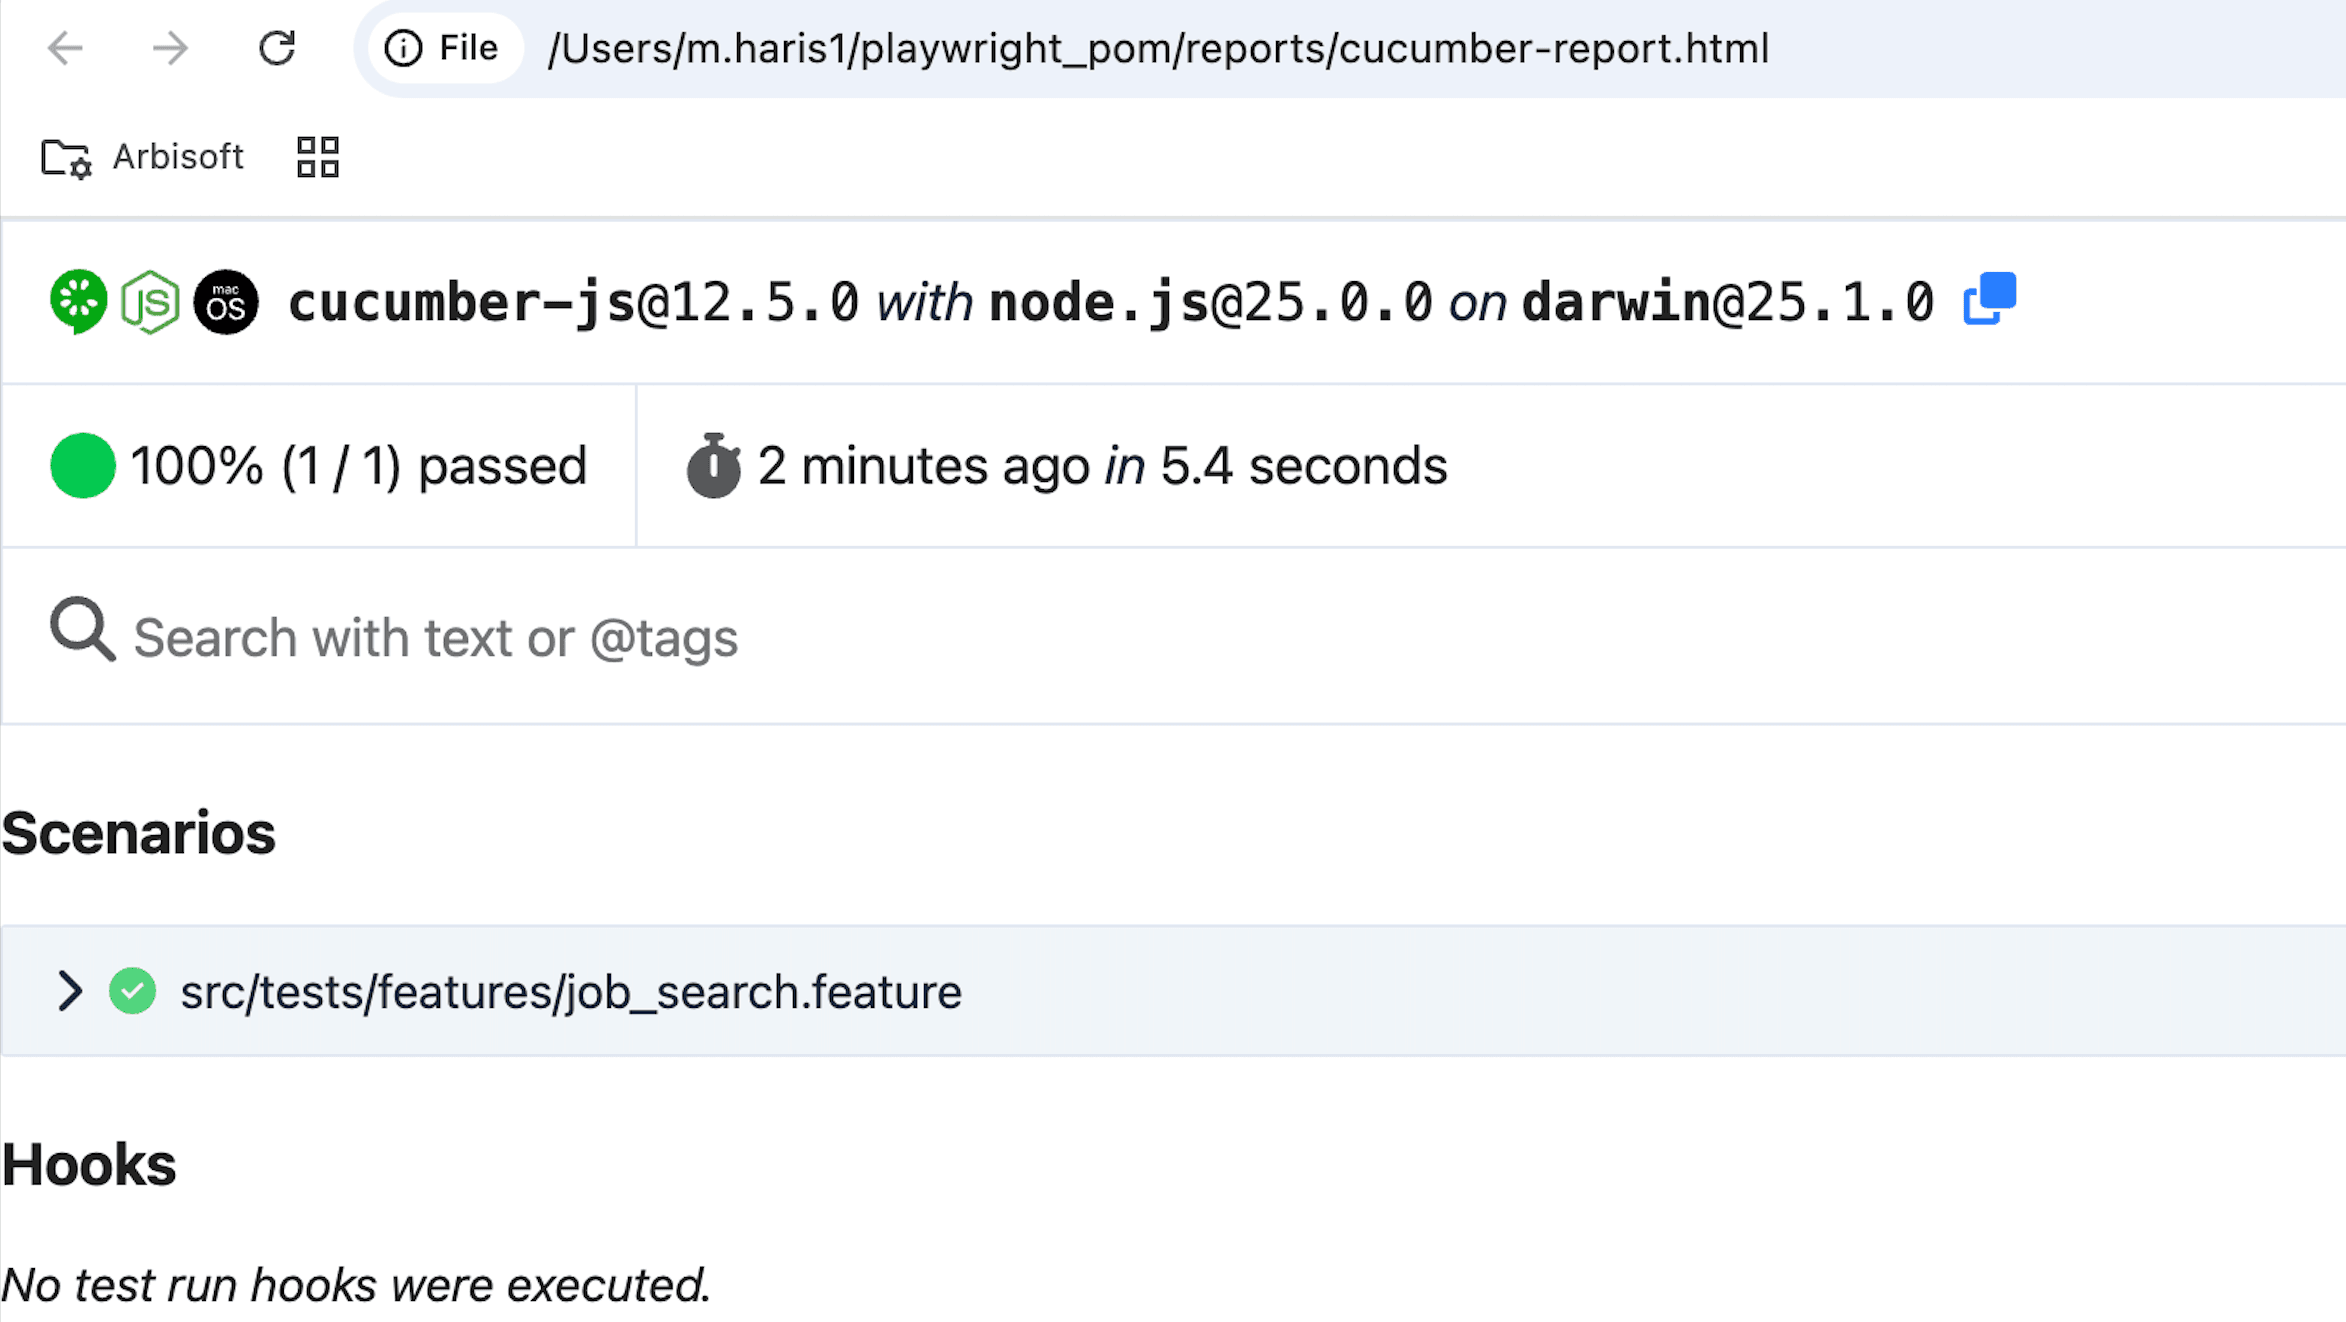
Reports
Let’s add some native reporting to the project in config/cucumber.js:
format: [
"progress-bar",
"summary",
"json:reports/cucumber-report.json",
"html:reports/cucumber-report.html"
]
After running the command again:
npm run cucumberThe JSON and HTML reports are generated in the reports folder. These reports display the execution time, Node.js version, and Cucumber test results.
Conclusion
In this blog, we successfully integrated Cucumber with Playwright using TypeScript. We executed a complete end-to-end (E2E) scenario using a real browser, validated application behavior using assertions, and ensured our tests were reliable and readable through BDD practices. This foundation makes it easy to scale our automation framework by adding hooks, page object models, reporting, and CI/CD integration.
Playwright and Cucumber together provide a powerful combination: fast, reliable browser automation paired with clear, business-readable test scenarios. With this setup in place, we are well-equipped to build maintainable and robust test automation for modern web applications
Just published