Trusted by Market Leaders in Education, Travel, Finance and E-commerce since 2007


We put excellence, value and quality above all - and it shows


A Technology Partnership That Goes Beyond Code

“Arbisoft has been my most trusted technology partner for now over 15 years. Arbisoft has very unique methods of recruiting and training, and the results demonstrate that. They have great teams, great positive attitudes and great communication.”


Playwright Visual Testing: A Complete Guide to Reliable UI Regression Tests


Nowadays, web applications are updated frequently. The content, color, and layout updates every day. The traditional functional tests will not tell us when the UI breaks. That’s the point where visual testing comes in.
In this blog, we’ll learn how to implement visual regression testing in test automation using Playwright. We’ll write tests that remain stable even when our UI is dynamic.
What is Visual Testing?
In visual testing, we compare screenshots of a web application eventually to detect unexpected UI changes.
So, instead of checking “Is the login button clickable?”, we verify “Does this button still look the same?”.
Playwright is a great choice for visual testing because it has its own built-in screenshot comparison tool, and no third-party tool is required. It provides us with native screenshot assertions and element-level screenshots as well (not just full pages).
Project Setup
In this step, we are creating a new folder on our Mac/Windows machine. Rename it as e.g. playwright_visual_testing. Now, open the folder in your IDE, e.g., VS Code. Go to the terminal in your IDE and run the command given below:
npm init -y
It will create a package.json file and a Node project in the folder.
We need to install Playwright. The command below will install the latest version of Playwright:
npm init playwright@latest
During installation, you will be asked for:
- Code language JavaScript/TypeScript?
- Location where you put your end-to-end
- (e2e) tests?
- add a GitHub?
- install browsers?
After installation is completed, you will see:
- package.json file is created in the project folder
- package-lock.json file is created in the node_modules
Creating your First Visual Test
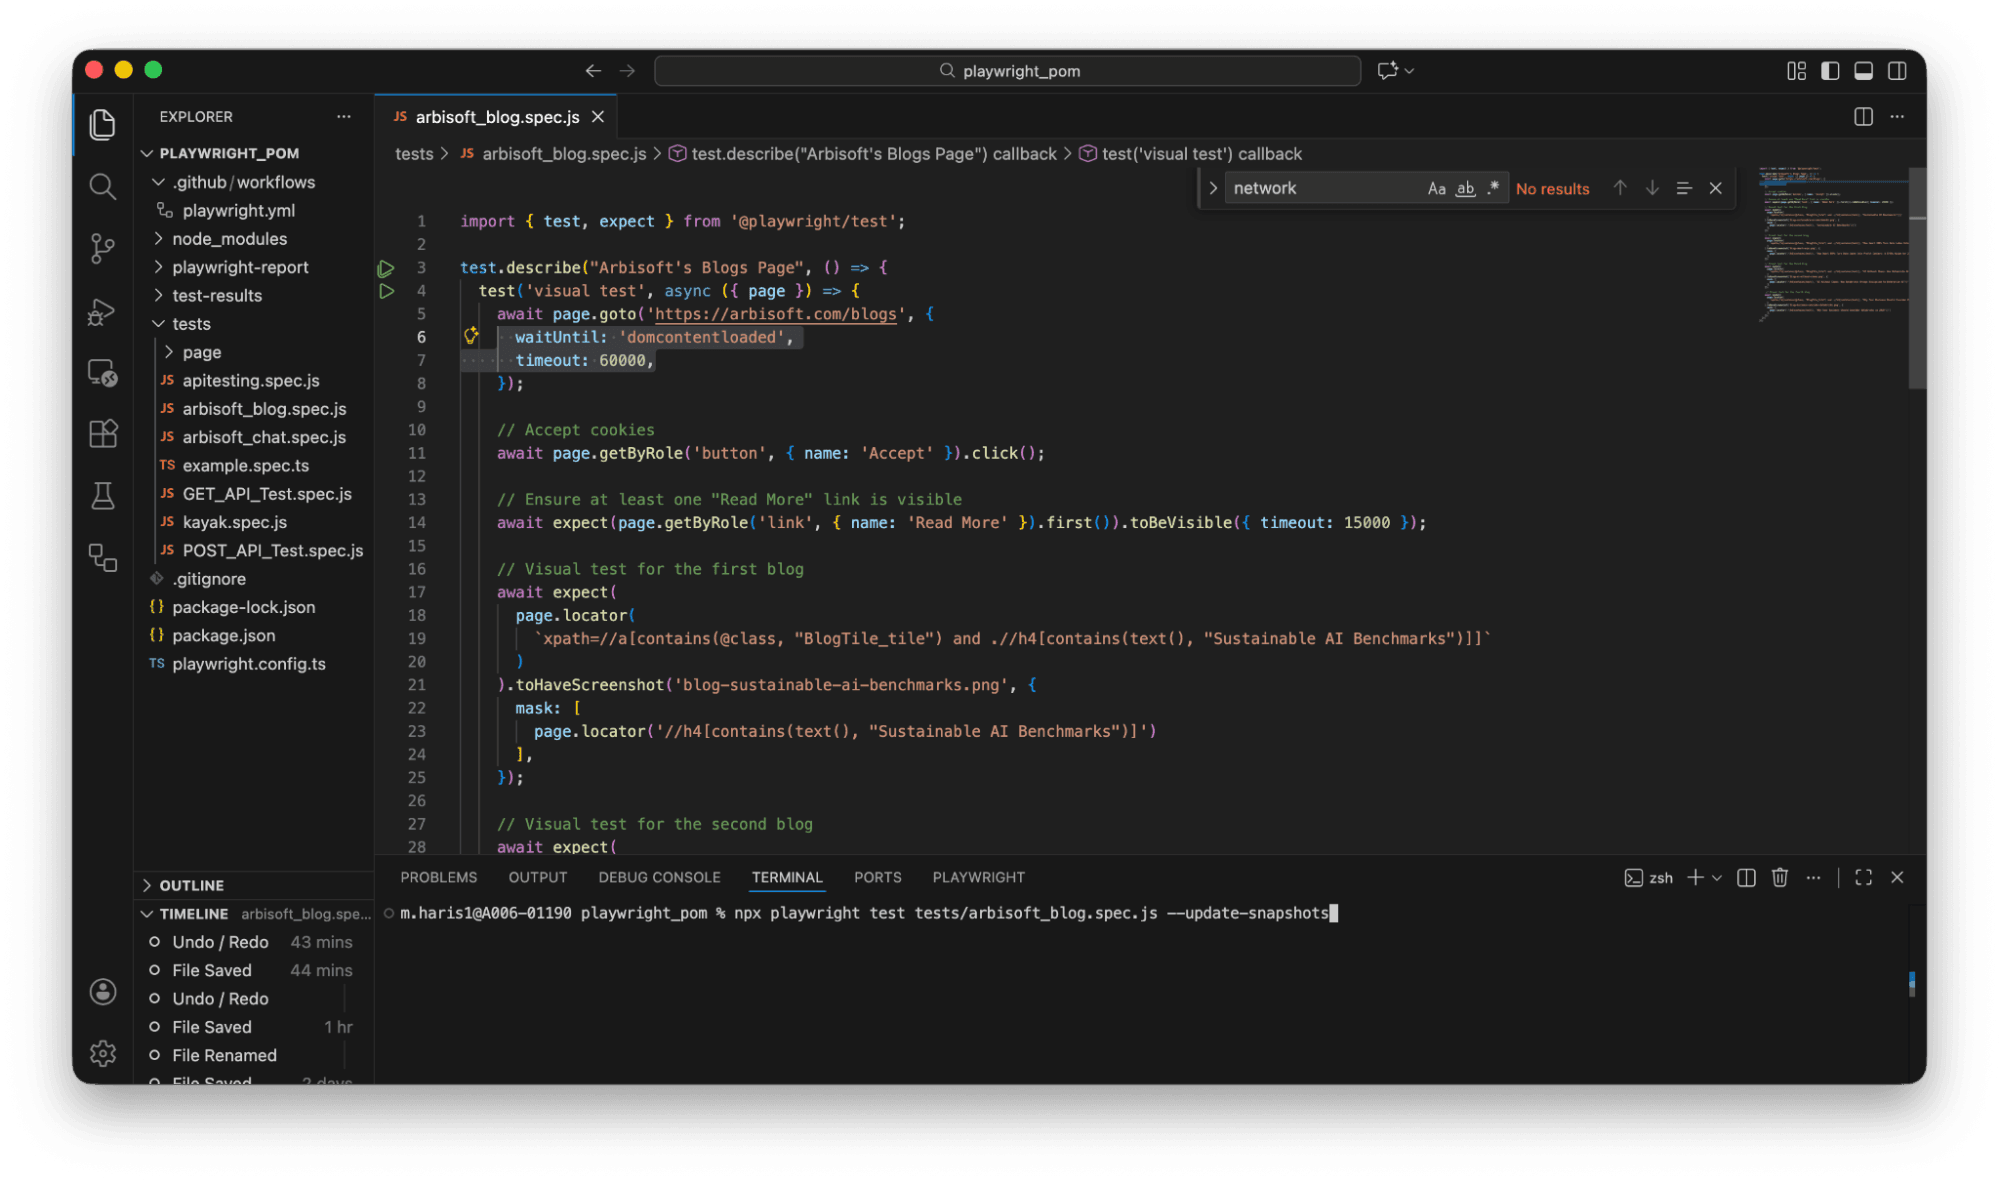
You have to select the tests folder in your Project. You see, it has one existing sample test. Now, I am adding a new file here, e.g., arbisoft_blog.spec.js. Open the file and add the following:
import { test, expect } from '@playwright/test';
This imports test and expect packages from the Playwright test library.
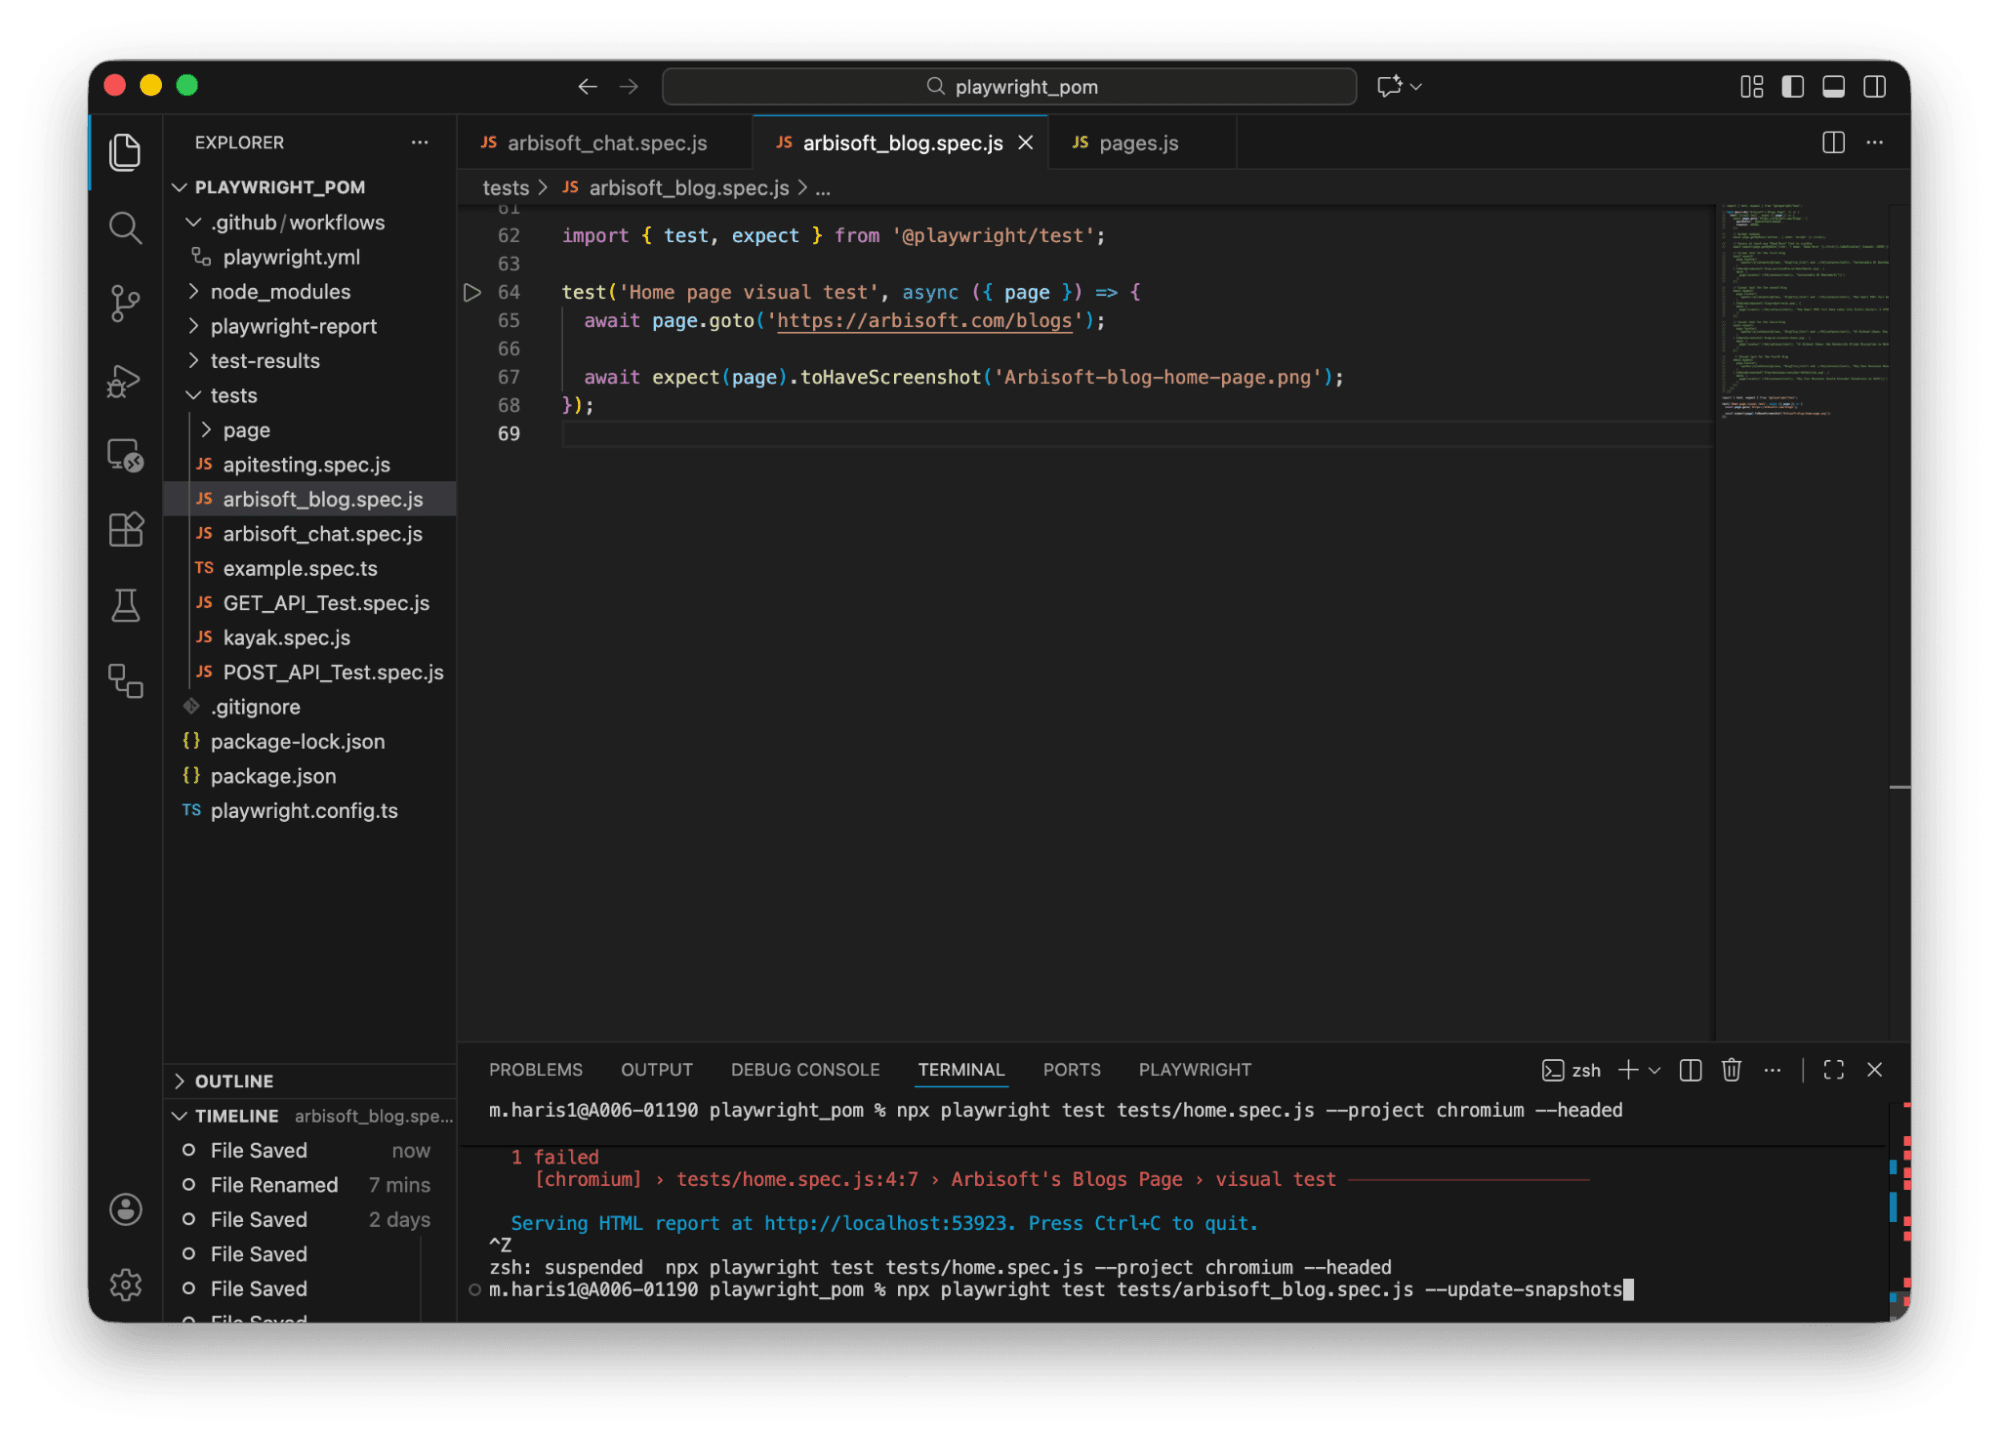
Let’s create a basic visual test for our web application, and I will use the blogs page of arbisoft.com, i.e., https://arbisoft.com/blogs. Below is the test code:
test('Home page visual test', async ({ page }) => {
await page.goto('https://arbisoft.com/blogs');
await expect(page).toHaveScreenshot('Arbisoft-blog-home-page.png');
});
Now, open the terminal of your IDE and run the following:
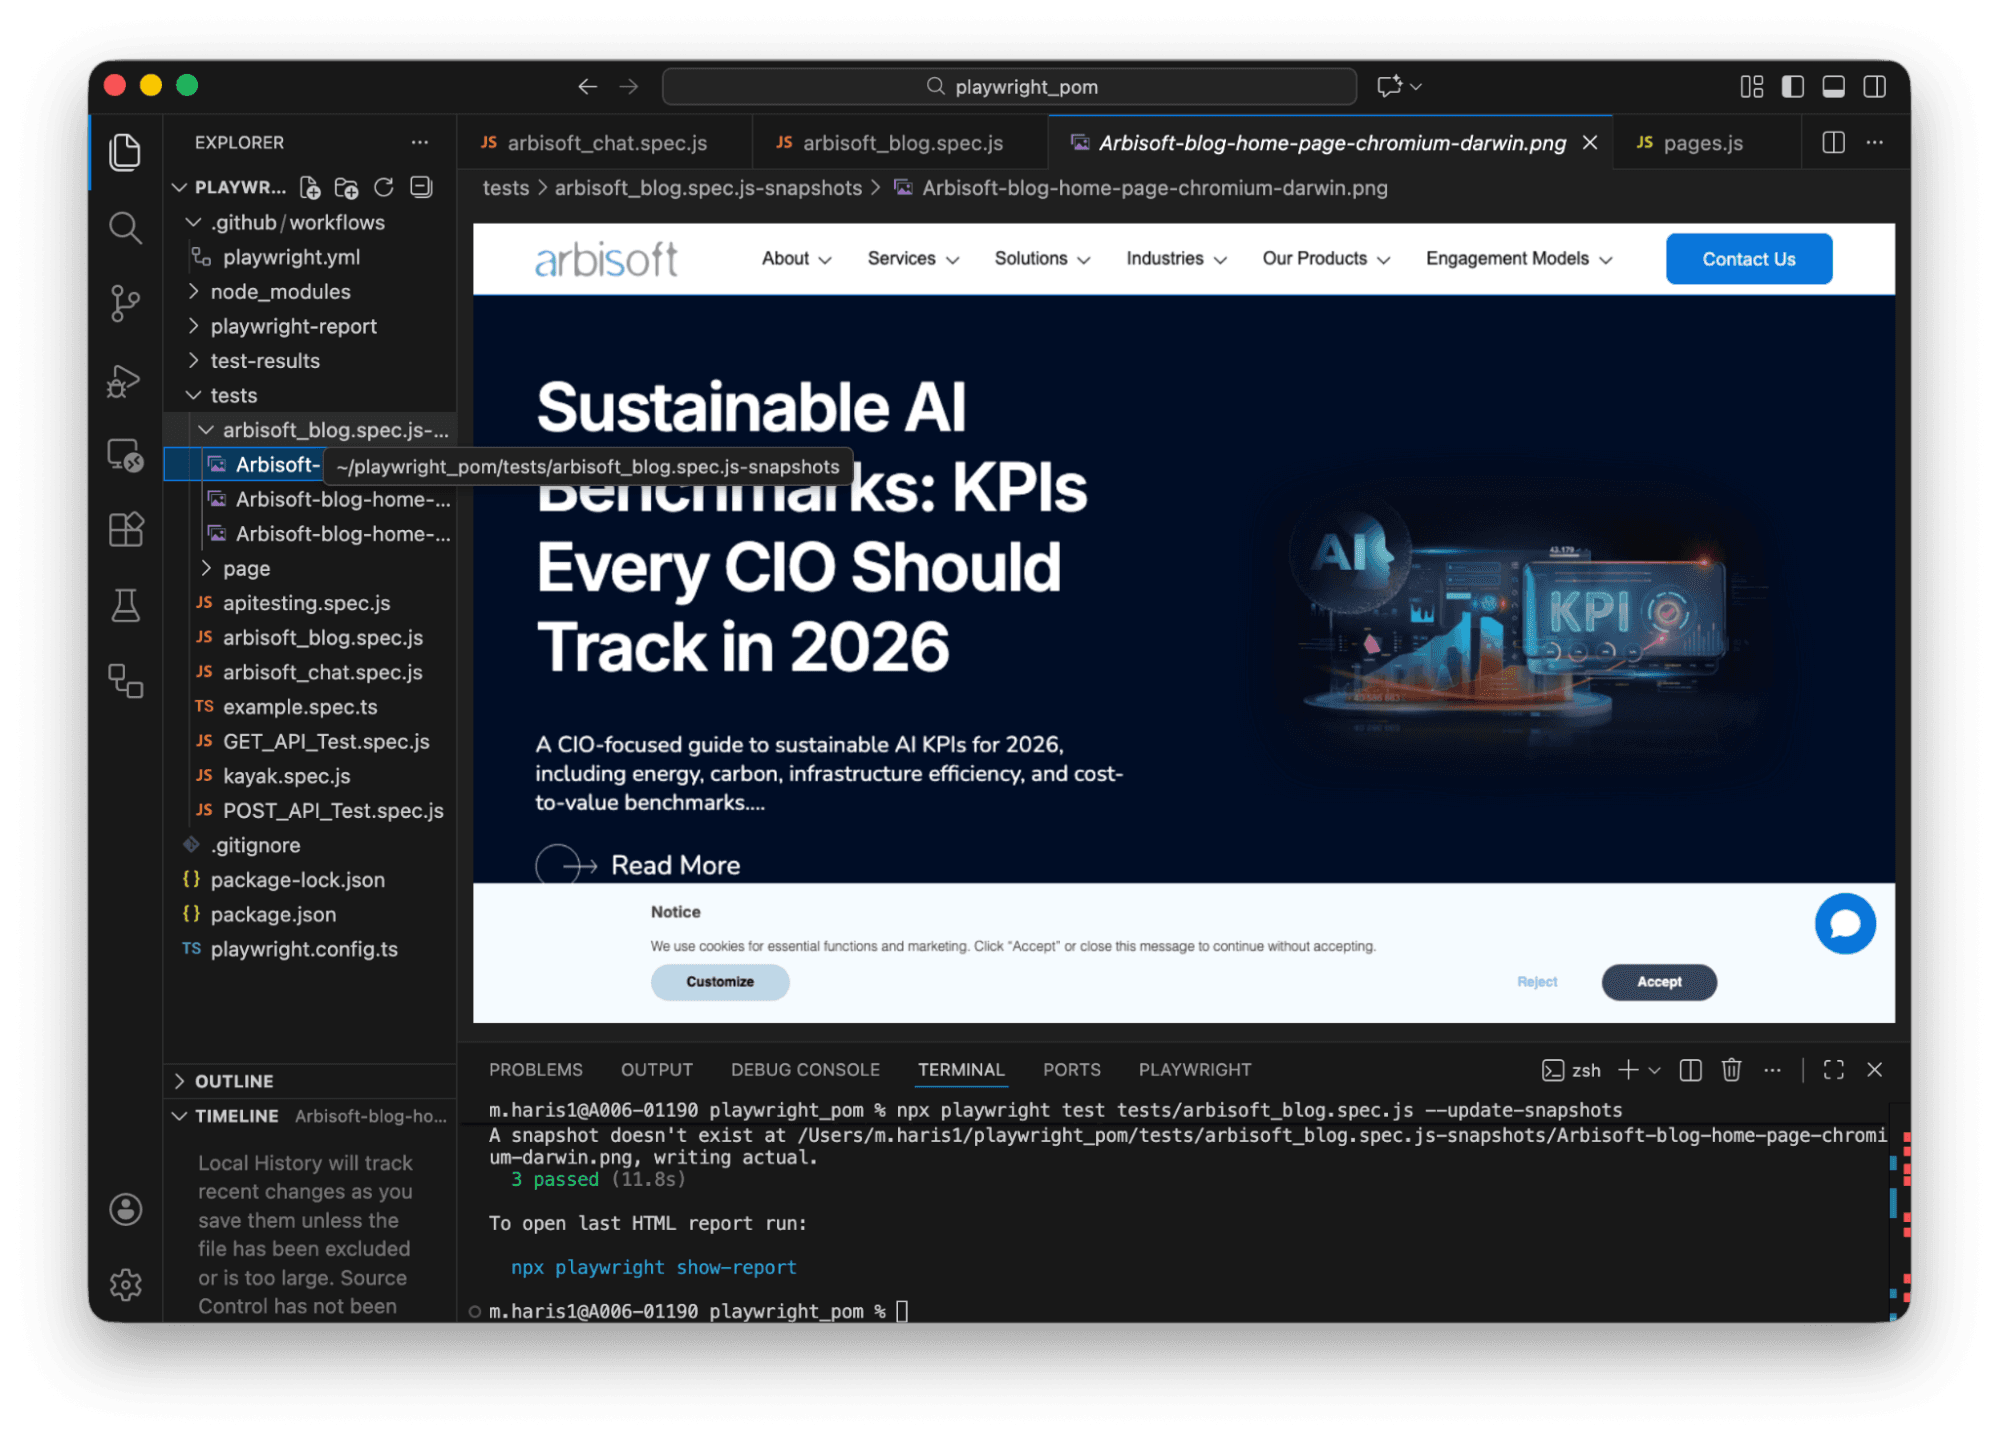
npx playwright test tests/arbisoft_blog.spec.js --update-snapshots
It will create the baseline screenshots, and they will become your expected results. If UI differs, then the test will fail.
The screenshot below shows the baseline screenshots are created by playwright.
Now, let’s create a few element-level visual tests for some step executions on Arbisoft’s blogs page.
- Accept cookies
- Ensure at least one "Read More" link is visible
- Visual test for the first blog
- Visual test for the second blog
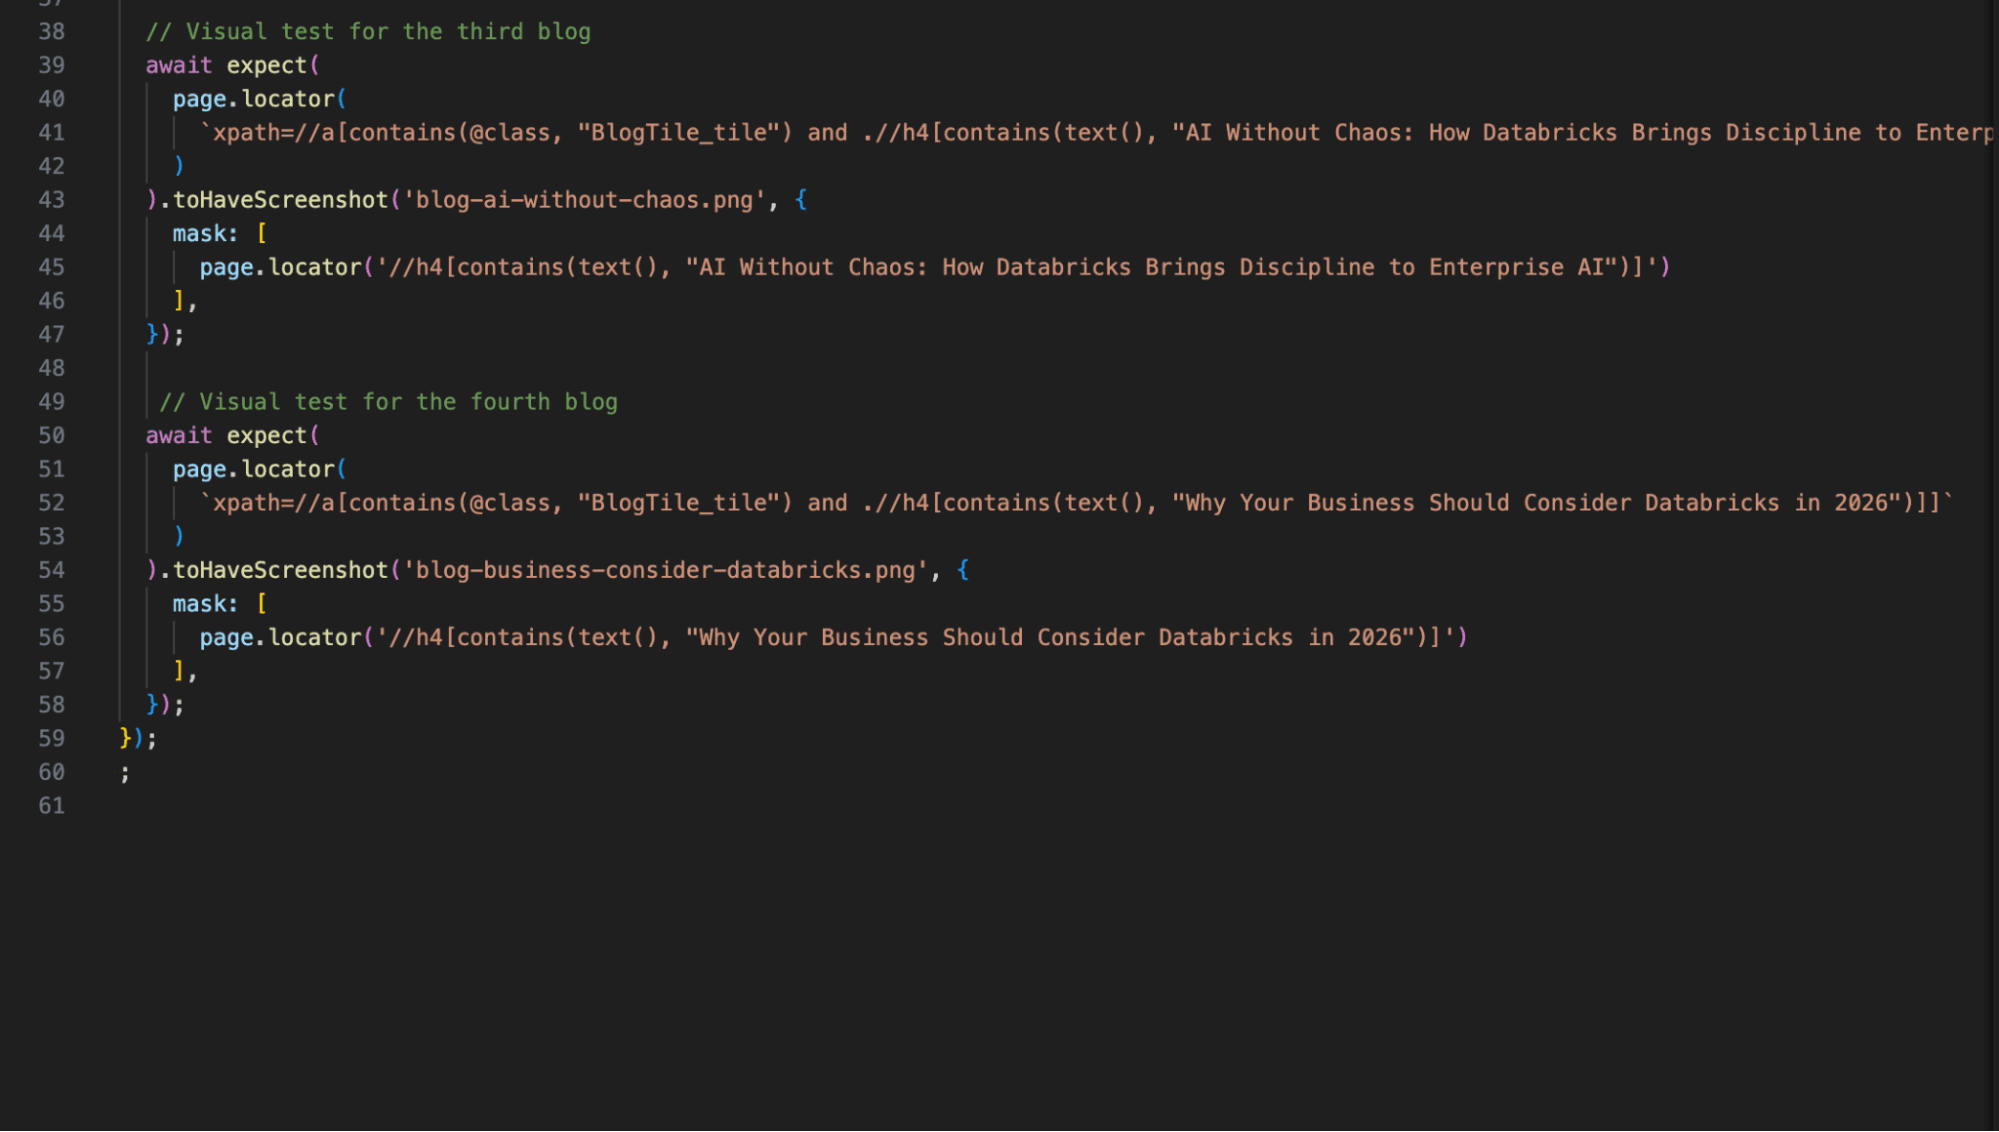
- Visual test for the third blog
- Visual test for the fourth blog
The screenshots below show the entire code:
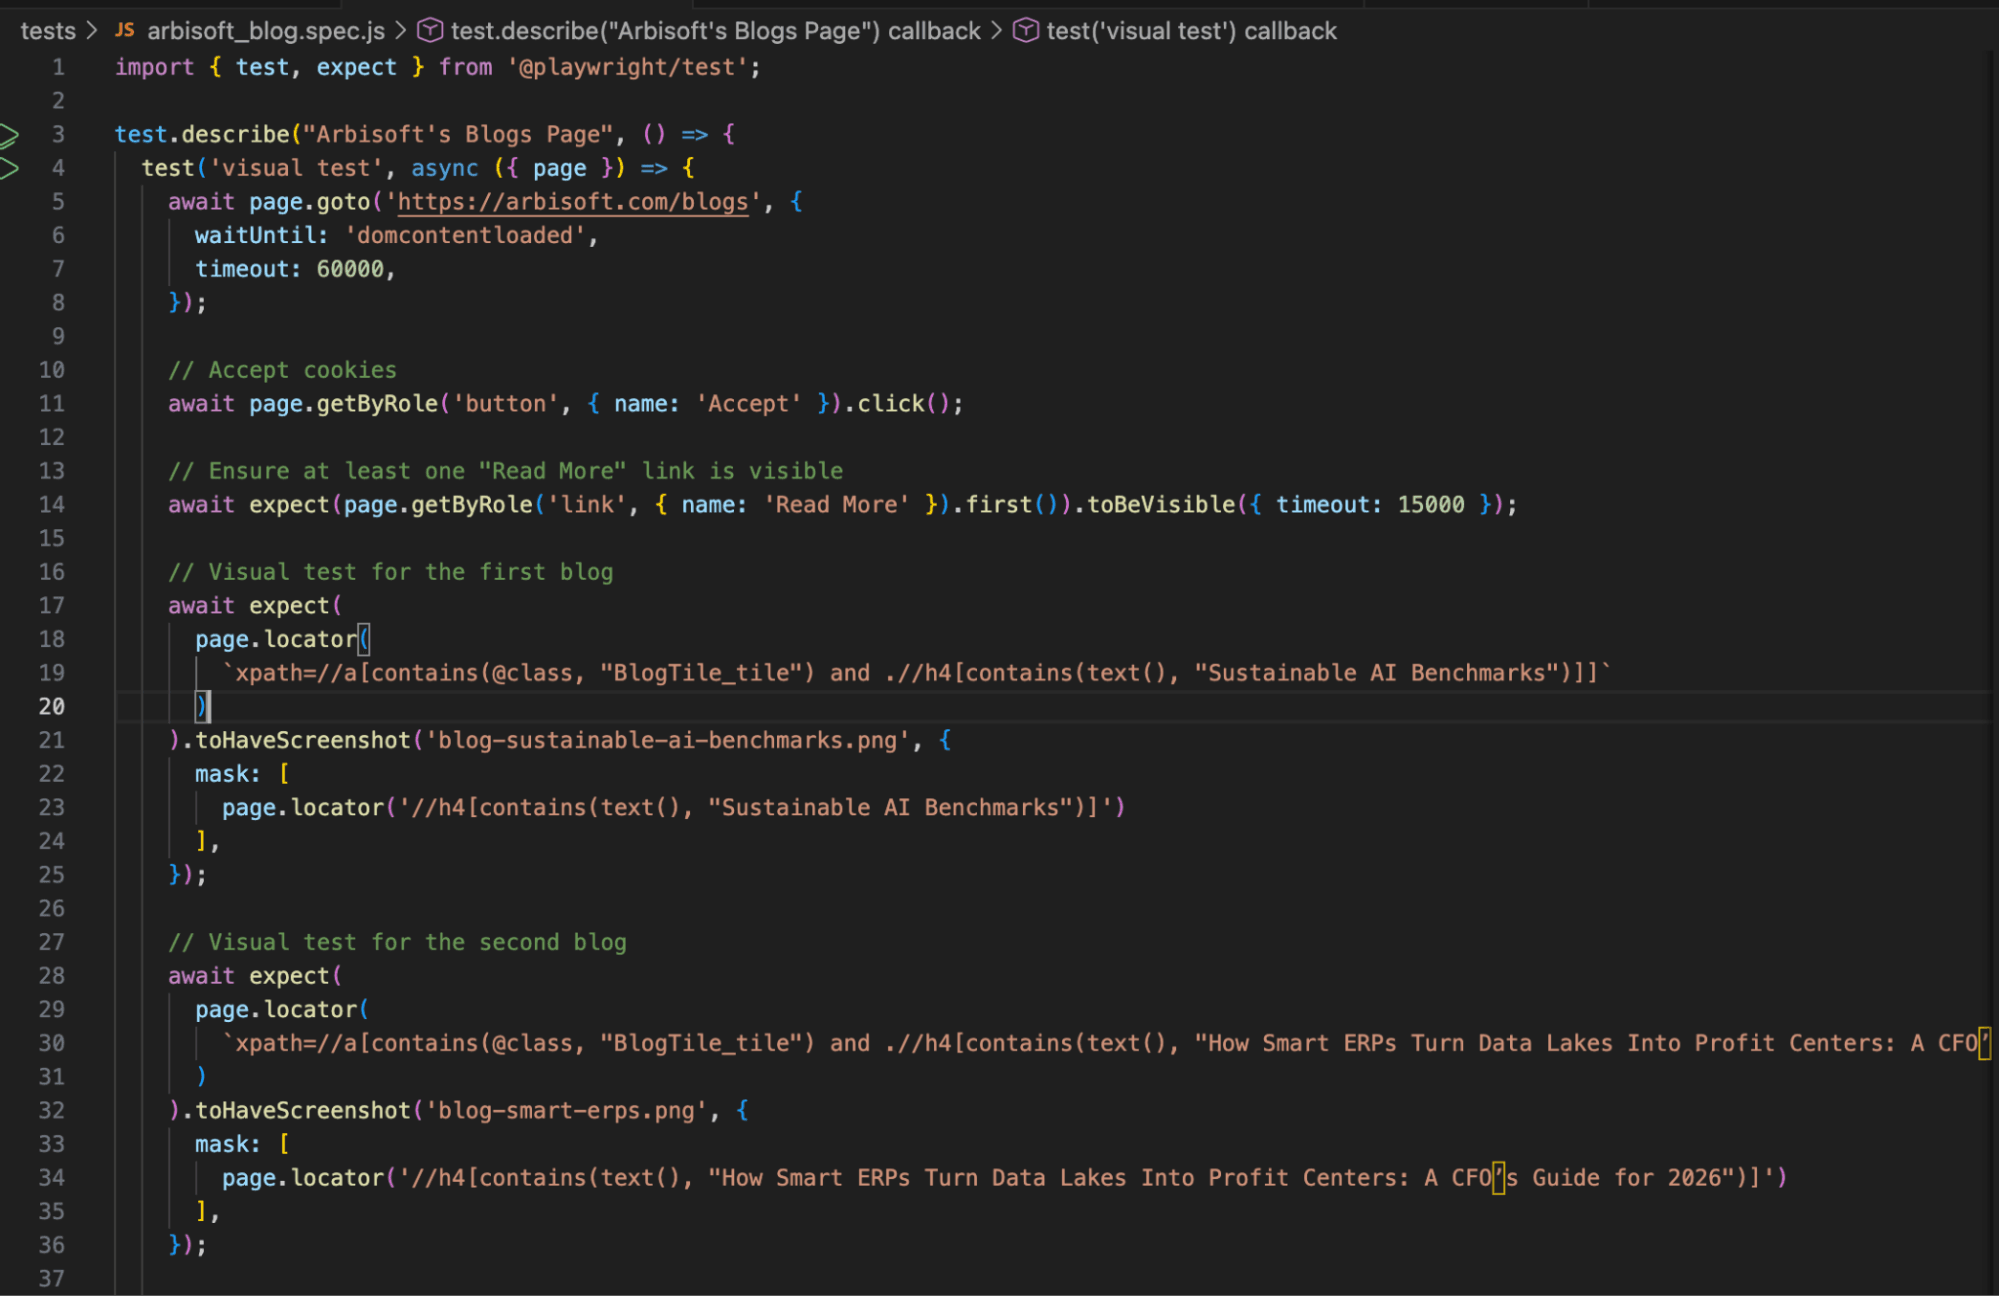
If you look at the above code, I used:
- waitUntil: 'domcontentloaded', timeout: 60000,
- Playwright will wait for 60 seconds to ensure slow page loads don’t fail the test.
- toBeVisible();
- It waits for a stable UI element. It ensures the page is actually usable, not just loaded.
- first()
- It handles “Strict Mode Violation” errors in Playwright. It tells Playwright exactly which element you want.
- Mask
- It is used to mask the dynamic content, e.g., (h4 text in our examples). Because they can break visual tests. Masked content is ignored by the Playwright during comparison.
Now, delete the old screenshots because they were of a basic test. Let’s run our test file again.
npx playwright test tests/arbisoft_blog.spec.js --update-snapshots
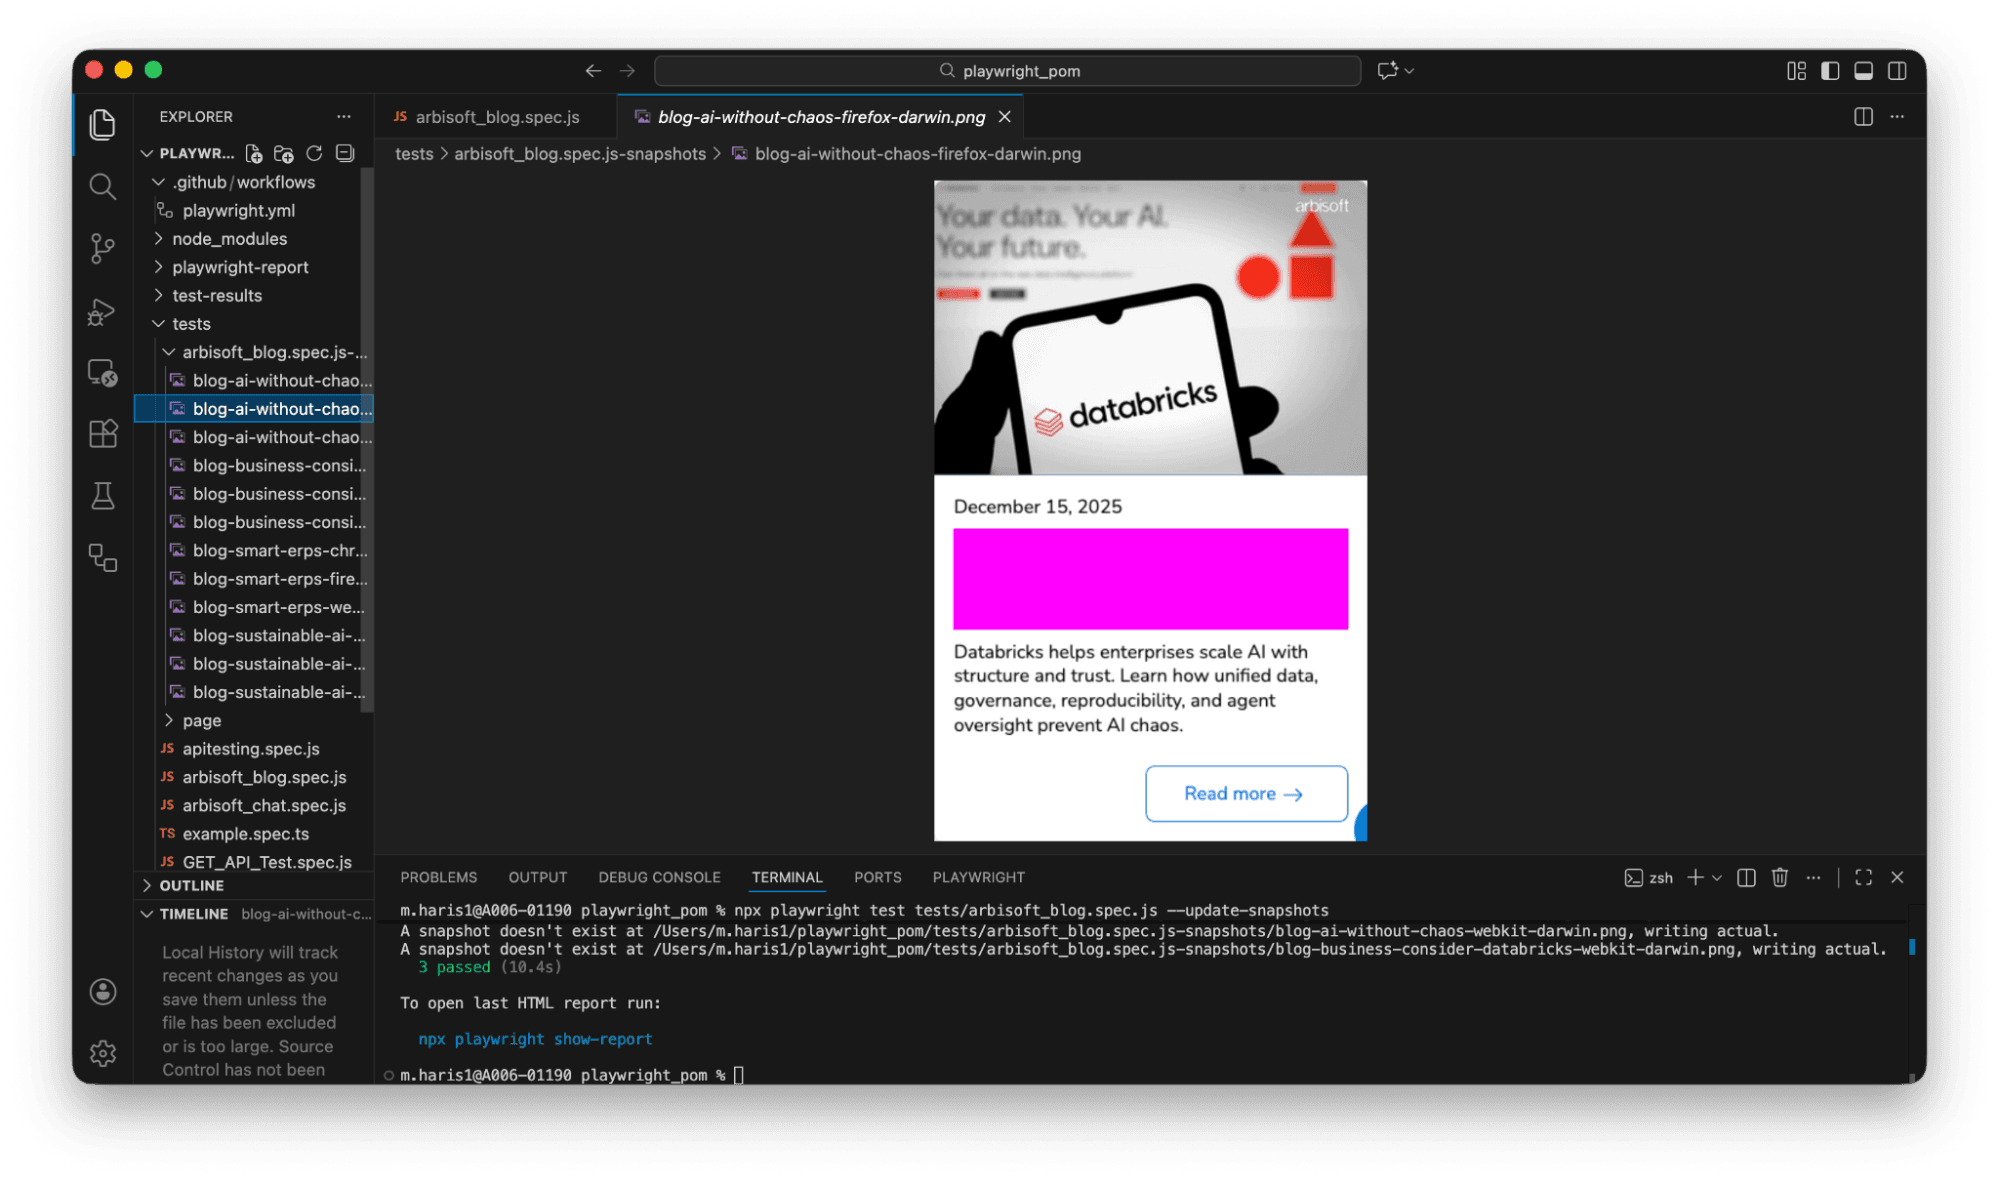
The screenshots are created. We have learned that they are our baseline screenshot. Let’s run the test file without updating screenshots because we need to check that the actual results match the expected saved screenshots. Run the following command:
npx playwright test tests/arbisoft_blog.spec.js
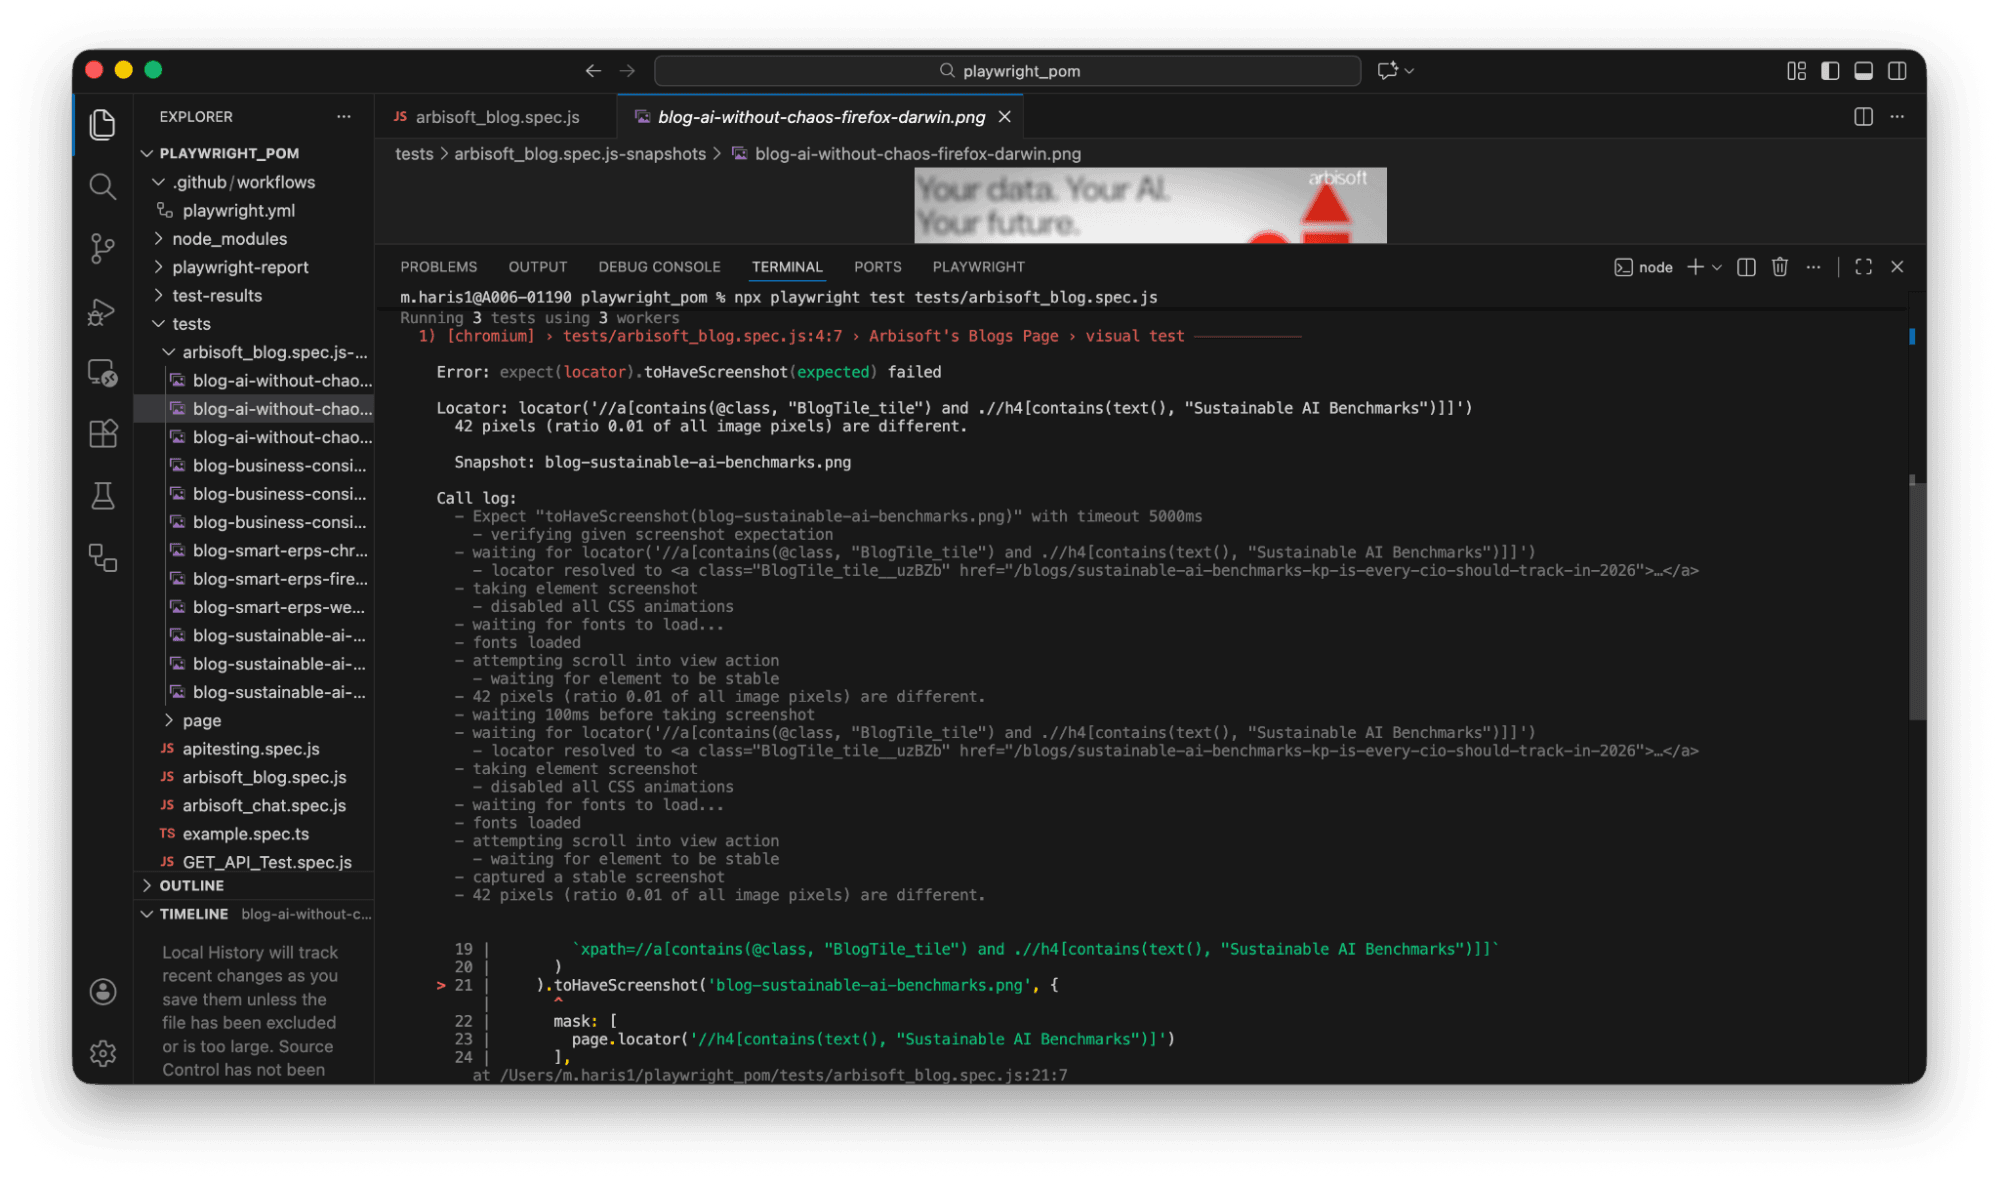
We have errors in the terminal. This is actually expected in visual testing. If you look at the report, Playwright is comparing screenshots pixel by pixel.
- Chromium:
- Error: expect(locator).toHaveScreenshot(expected) failed
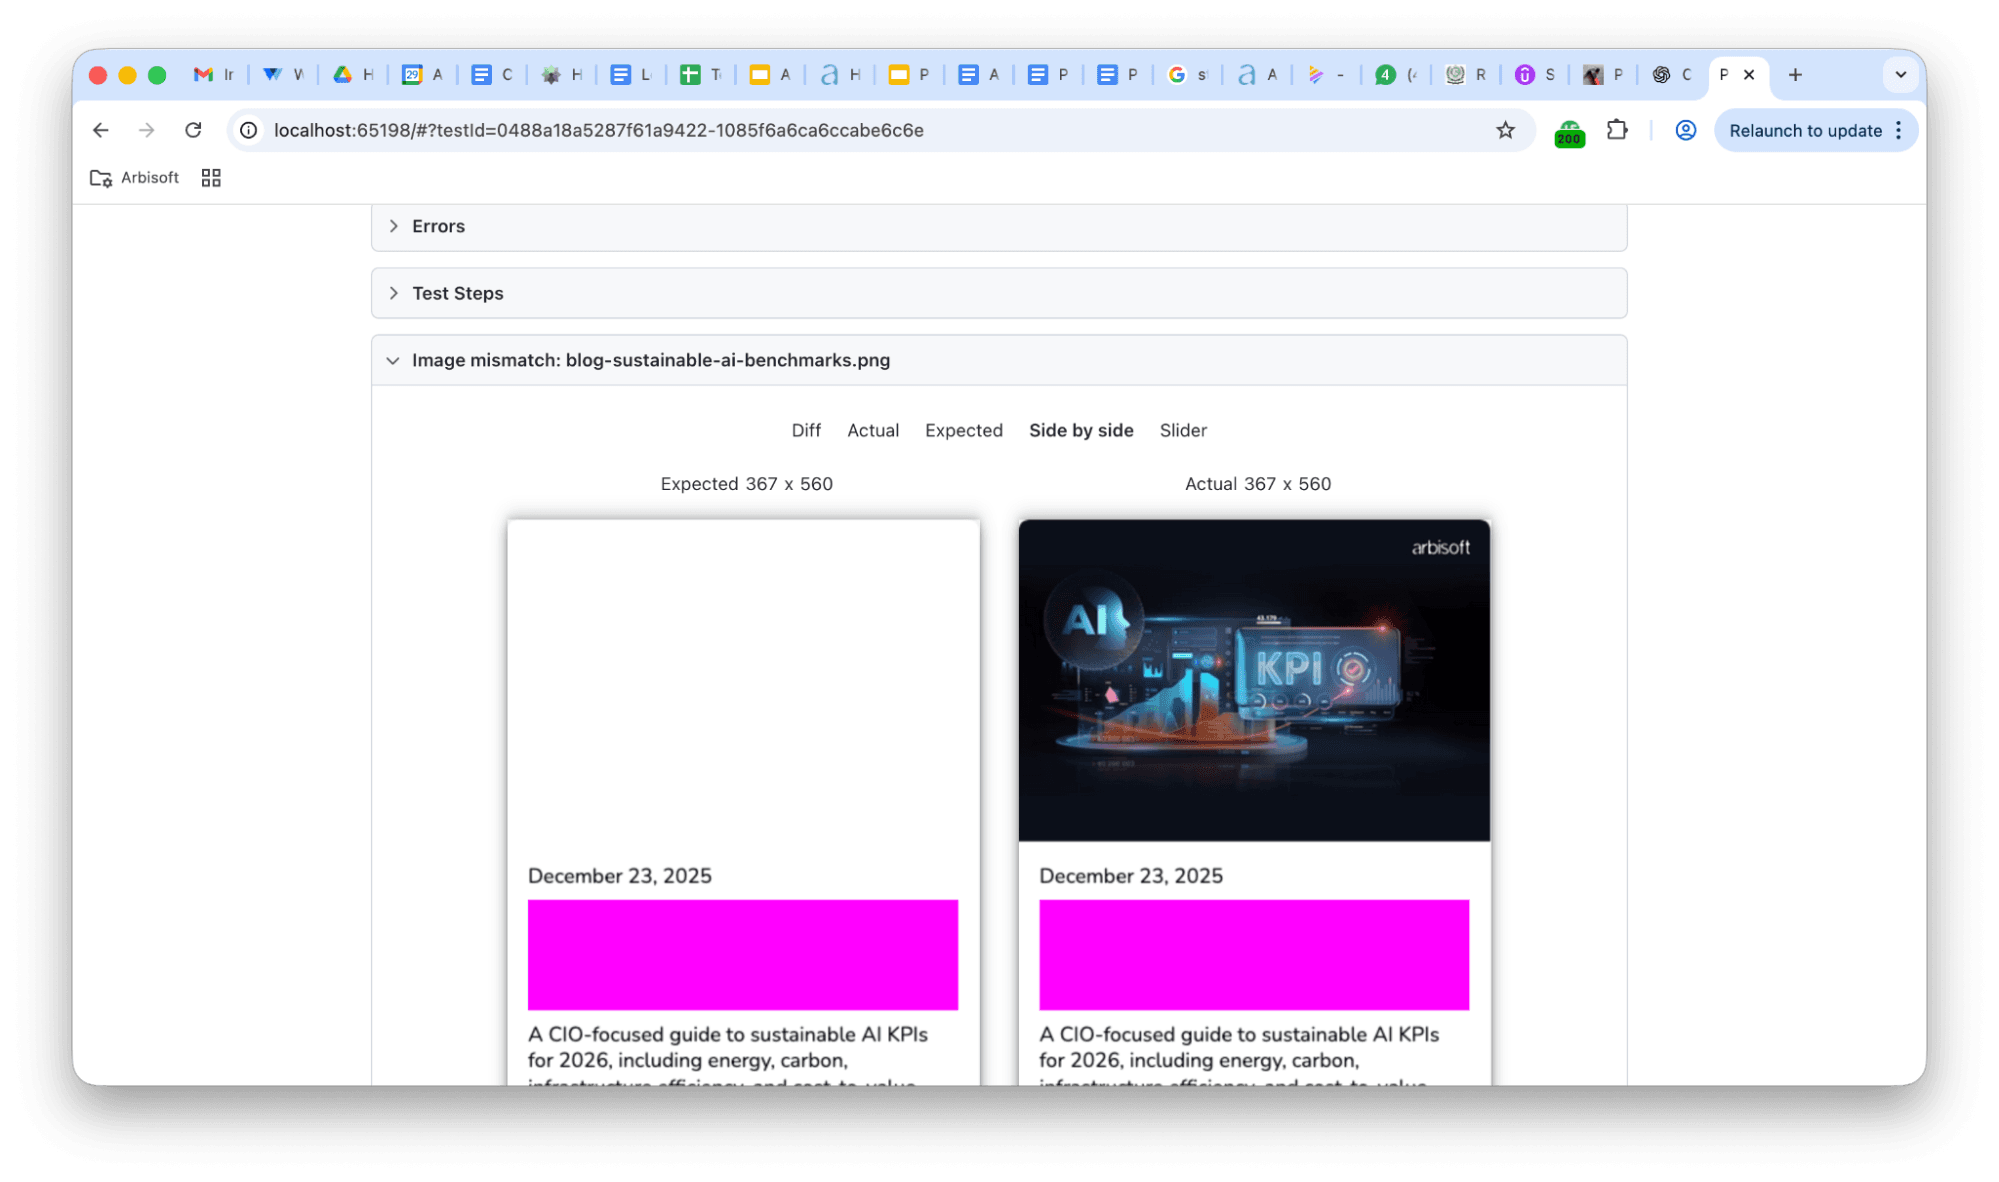
- Locator: locator('//a[contains(@class, "BlogTile_tile") and .//h4[contains(text(), "Sustainable AI Benchmarks")]]')
- 42 pixels (ratio 0.01 of all image pixels) are different
- Snapshot: blog-sustainable-ai-benchmarks.png
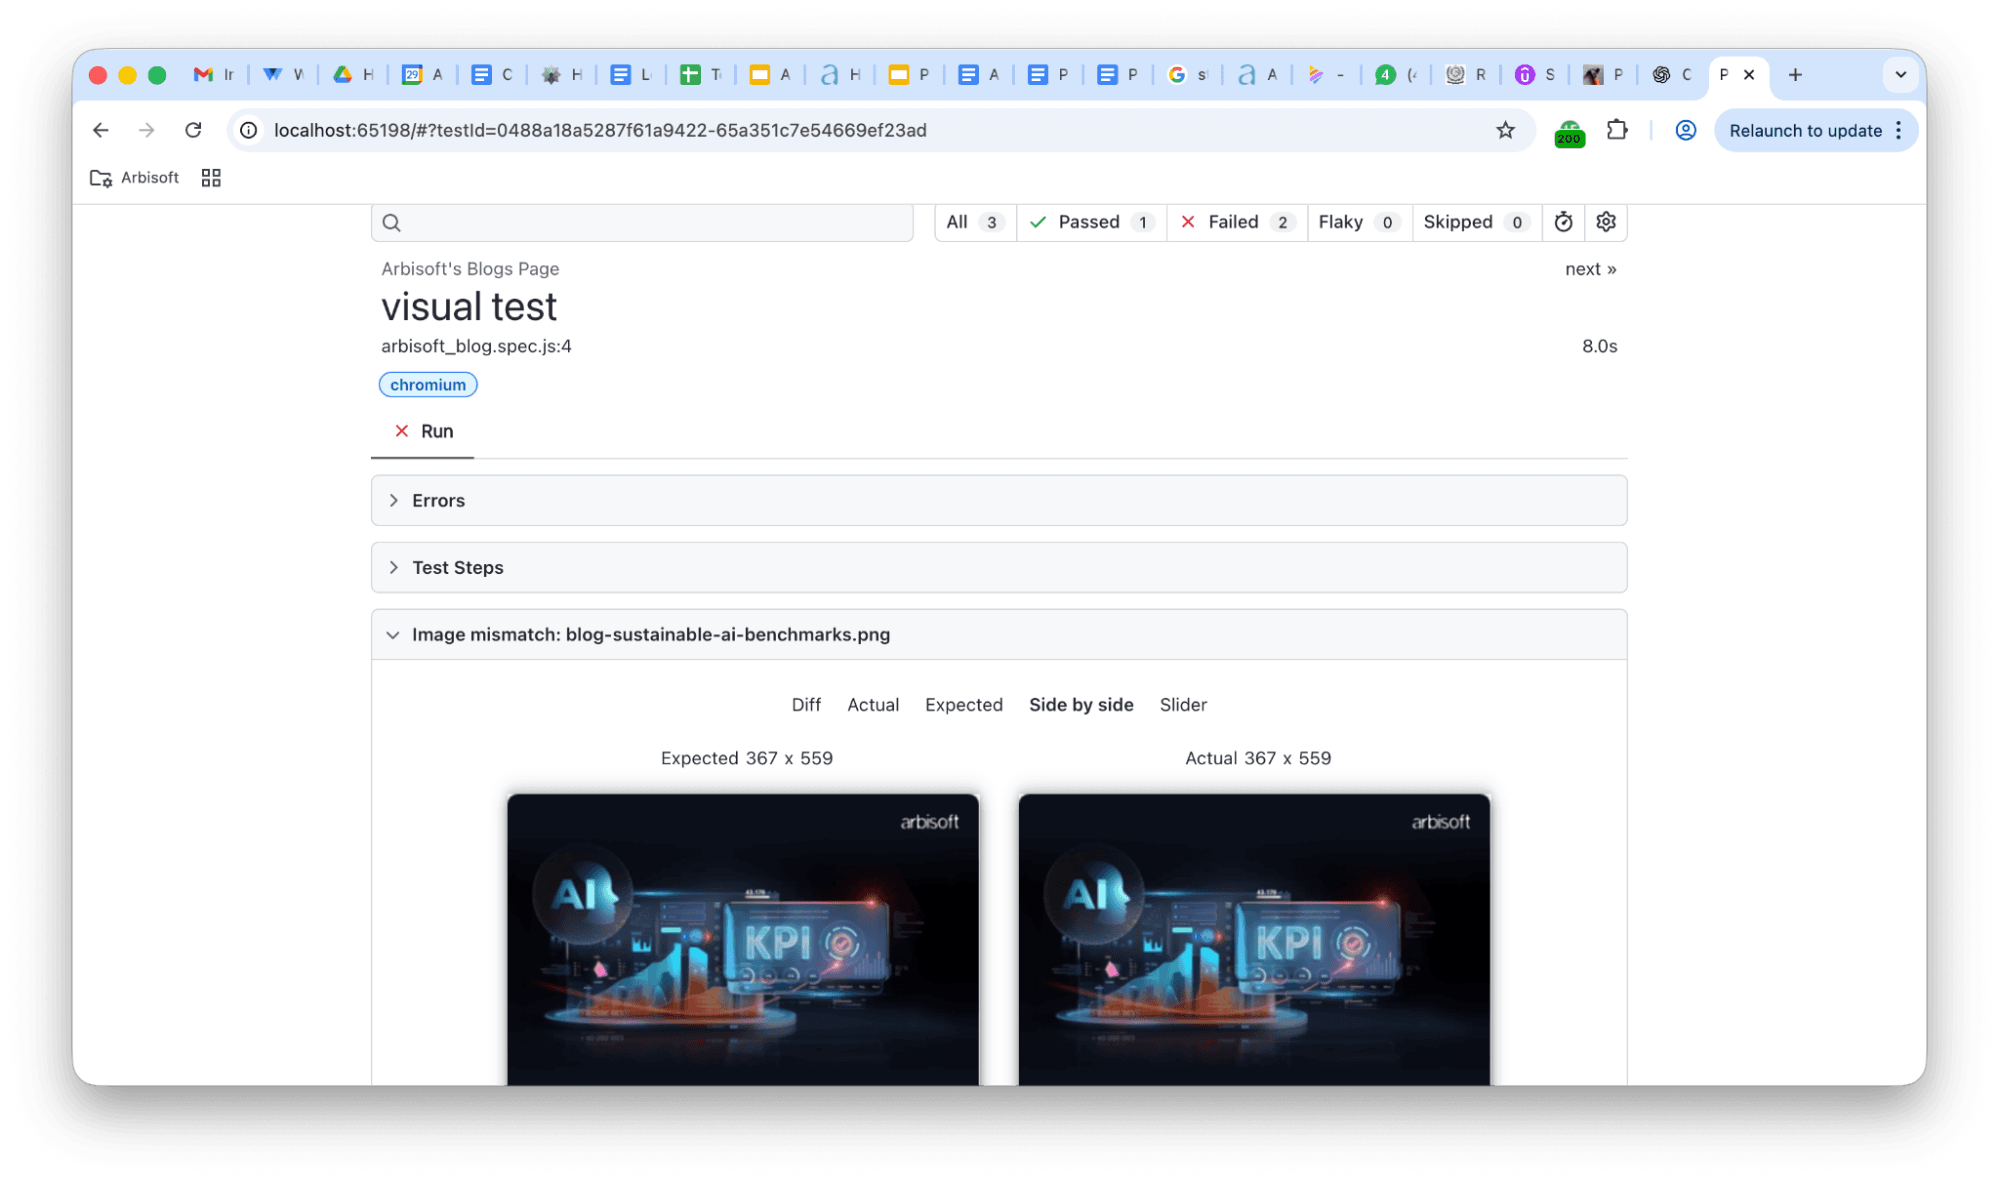
- Firefox:
- Error: expect(locator).toHaveScreenshot(expected) failed
- Locator: locator('//a[contains(@class, "BlogTile_tile") and .//h4[contains(text(), "Sustainable AI Benchmarks")]]')
- 89046 pixels (ratio 0.44 of all image pixels) are different
- Snapshot: blog-sustainable-ai-benchmarks.png
This does not mean our test is wrong. We should know here that each browser has its own rendering. They:
- render fonts differently
- have different text wrapping
- produce different element sizes
So, the cross-browser visual snapshots will nearly match or almost never match.
Best Practices
1- We Need to Run Our Visual Tests in One Browser
Visual regression tests should usually run in Chromium only.
npx playwright test tests/arbisoft_blog.spec.js --project=chromium
2: Allow Small Visual Differences (Tolerance)
For a tiny difference like 1%, add tolerance:
await expect(blogTile).toHaveScreenshot('blog-sustainable-ai-benchmarks.png', {
maxDiffPixelRatio: 0.02, // allow up to 2% difference
});
Use this meagerly.
3: Mask More Dynamic Areas
Text wrapping is often the biggest culprit. Mask the date or description.
Conclusion
Visual testing with Playwright adds an additional layer of confidence to our test automation. We can integrate visual tests into our current test automation suites easily. By comparing screenshots across test runs, Playwright is very handy to catch visual regression bugs, such as unintended UI changes, broken layouts, or missing elements, that functional tests alone might miss.
Playwright makes visual testing fast and reliable because of its built-in screenshot and snapshot comparison capabilities. It can easily integrate into existing end-to-end (e2e) tests. Combined with modern workflows like CI/CD pipelines, visual testing enables QA teams to detect UI issues early, reduce manual review efforts, and maintain a consistent user experience (UX) across platforms, browsers, and devices. Incorporating visual testing into your Playwright framework results in more robust test coverage, higher-quality releases, and greater confidence in every deployment.
Just published


